Shields up! Why the damage system in Halo: Flashpoint is an absolute game changer
Anyone who reads my blog regularly knows that I’m deep into classic BattleTech is deeply rooted. I love it when armor is melted away by the square inch, internal structure breaks and the critical hit blows up the reactor at the end. It’s mechanically great, but it also feels like a tough war of attrition.
So when I played the first few rounds of Halo: Flashpoint, I was extremely excited to see how Mantic Games would capture the typical feel of the digital original. And what can I say? The interplay between energy shields, armor and health is an absolutely great system. It perfectly captures the hectic, highly tactical “shield breaks – take cover!” feeling of the Xbox classics.
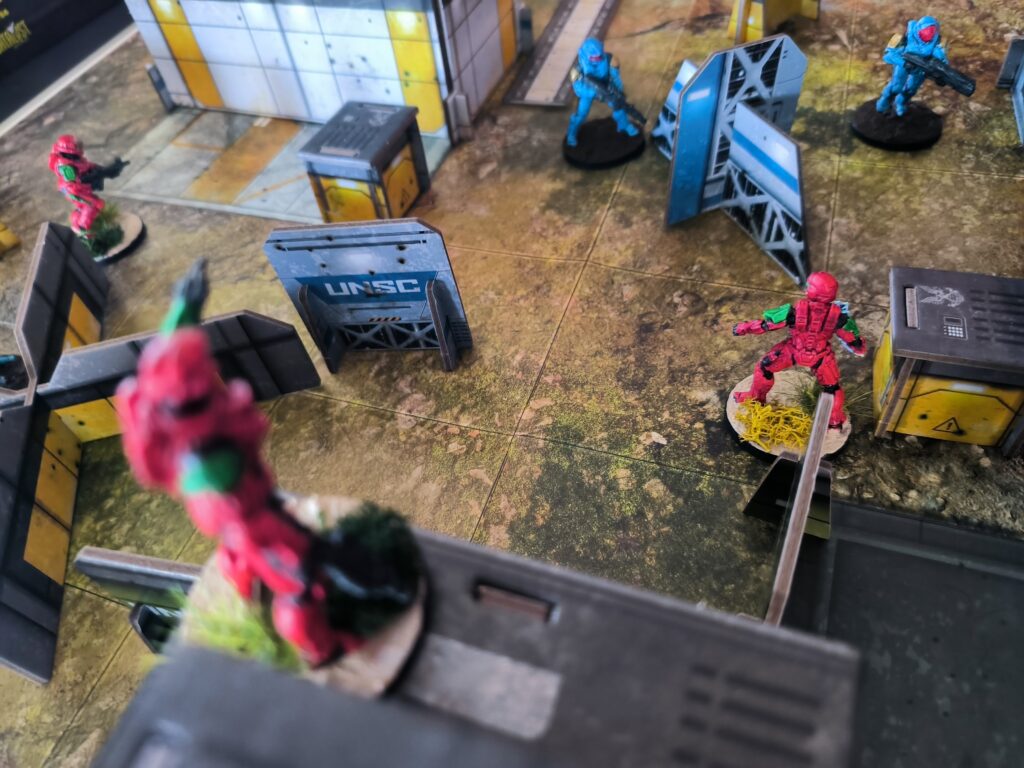
Today we take a closer look at how damage handling works in detail and why a close look at the profiles of your miniatures makes the difference between victory and respawn.
The three lines of defense: how the damage flow works
In Halo: Flashpoint, a model doesn’t just die from the first good hit. Each time an enemy attack (whether ranged or melee) generates successfulhits, the damage works its way through three separate layers of protection.
Step 1: The energy shields (the buffer)
Before anything else happens, your shields absorb the damage. Each hit turns one of your shield markers from the charged side to the uncharged side.
- The advantage: Shields completely ignore the damage value or the penetrating power of the weapon. A hit is a hit.
- The problem: once they are down, you are vulnerable.
Step 2: The armor (the damage reducer)
If all shields have collapsed and there are still hits remaining, the physical armor(Armour) of your armor protects you. Your armor value deducts a fixed number of remaining hits.
But here comes the catch: Many weapons have the Armor Piercing (AP) value. AP lowers your armor for this specific attack.
- If you have an armor of 2 and are hit by a weapon with AP 1, you still have 1 point of armor left.
- If a weapon with AP 2 (or higher) hits you, your armor is completely negated. Every remaining hit goes straight through.
Step 3: Health & Wounding (The bitter end)
Each hit that is neither eaten by the shield nor blocked by the armor becomes awound. If the number of wounds reaches or exceeds thehealth value of the model, it flies off the field. But don’t panic: We’re playing Halo – the respawn is already waiting for the next activation!
Two practical examples: putting theory to the test
To illustrate just how dramatic the effect of choosing the right weapon can be, let’s take a look at two scenarios straight from the rulebook.
Scenario 1: Ranged combat (Battle Rifle vs. Bulldog)
My Spartan Brawler is caught in the crossfire and takes a whopping 3 hits from a ranged attack. My Brawler still has 2 charged energy shields and an armor value of 2.
- Variant A (BR75 Battle Rifle): The weapon has AP 1. First the hits hit the shields. 2 shields block 2 hits – the shields are now down. 1 hit remains. Now the armor takes effect: The armor value of 2 is reduced to 1 by the AP 1 of the battle rifle. However, this remaining armor is exactly enough to completely block the last hit. Result: lucky, 0 wounds!
- Variant B (CQS48 Bulldog shotgun): The Bulldog comes with AP 2. The procedure remains the same at the beginning: 2 hits go into the shields, 1 hit remains. But now the AP 2 negates the Brawler’s entire armor (2 – 2 = 0). The hit goes through unchecked. Result: The Brawler receives 1 wound and is considered injured.
Scenario 2: Deadly close combat (watch out for the combat knife!)
It’s getting dirty. An enemy Brawler charges my Spartan Deadeye (2 shields, armor 2) in close combat and scores 4 hits. The attacker uses the M11 Combat Knife – and this weapon has a lot going for it, as it has the Energy Shield Depleter (1) special rule.
- Shield special rule: Before any hits are counted, the knife’s special rule automatically discharges one of my shields.
- Remaining shields: Of the 4 hits, the first is now absorbed by the last remaining shield. There are 3 hits left, the shields are gone.
- Armor removal: The knife has AP 2, which completely reduces the Deadeye’s armor (value 2) to zero. The armor no longer offers any protection!
- The verdict: All 3 remaining hits hit directly as wounds. As my Deadeye had already taken a wound beforehand, he now has a total of 4 wounds. This is exactly the same as his health – the Deadeye is knocked out and must re-enter the match via respawn in his next activation.
My conclusion for practice: Tactical learnings
What do we as tabletop strategists take away from this system?
- Shields are your life insurance, but not a panacea: you can run aggressively into the open field with full shields to secure a mission objective. But as soon as they are down, you have to get your model into cover as quickly as possible during the next activation so that they can regenerate.
- Use the right weapon for the right job: Shields don’t care about AP values. There is no point in firing an expensive weapon with high armor penetration at a model whose shields are still fully active. Shoot the shields down first with “Mass Fire” and then use AP weapons to make the deadly catch shot on the armor.
- Plan respawns strategically: Unlike BattleTech, where every loss hurts, death in Halo: Flashpoint is part of the tactical cycle. Sometimes it makes perfect sense to deliberately sacrifice a wounded Spartan in order to tie up the enemy, knowing full well that he will respawn at the baseline immediately afterwards, freshly strengthened.
Transparency notice on the use of AI (in accordance with the EU AI Act):
The content of this blog is personally conceived, researched and defined by me. I use generative artificial intelligence to help me formulate and structure the texts.
Why? This enables me to prepare complex issues more precisely and to focus fully on the quality of the content and research. The final editorial control and responsibility for all published content lies solely with me.
Together for better content!
This blog is a project of the heart that can only continue to grow with your help. Every comment, every recommendation – and especially your financial support – secures the future of this platform.
Do you want this content to remain freely accessible?
This is how you can support the mission:
- NEWSLETTER REGISTRATION: Become part of the fast-growing community and never miss an update again!
- BECOME A PATREON MEMBER: Join the inner circle and get access to exclusive material and early releases.
- OTHER SUPPORT: Whether it’s a donation, sharing a post or recommending the blog to others – every form of support counts!
Let’s make this blog an even better place together!
Ich bin Sören Spieckermann, der Kopf hinter mechstrategen. Seit Jahren faszinieren mich taktische Tabletop-Schlachten und die strategische Tiefe von Mechs. Ob schnelle Gefechte in Halo: Flashpoint oder epische Schlachten bei BattleTech Alpha Strike – hier teile ich meine Erfahrungen und Taktiken mit dir. Mein Ziel? Sowohl Einsteigern den Start zu erleichtern als auch alten Hasen neue Impulse für das nächste Match zu geben.