Massed attack with skewed battle formation – Tactical superiority in BattleTech Alpha Strike
BattleTech Alpha Strike is not just about firepower and armor – tactical finesse can decide battles. A particularly effective method of breaking through enemy lines or gaining local superiority is the “Massed Attack” strategy using the “Skewed Battle Order” tactic . In this article, I’ll show you how this strategy works – and how you can use it effectively in a game with two lances per side.
Strategy: Massed attack
The tactic of the massive attack is based on a simple but effective principle: overwhelming through concentration. Instead of distributing your own units evenly across the battlefield and putting “a bit of pressure” everywhere, you concentrate your striking power selectively on a weak point in the enemy formation. You prefer to attack the opponent’s“center of gravity“.
The three core principles of the “massed attack” strategy:
- Creating local superiority
Even if the total number of mechs on both sides is the same – whoever brings more units into battle at one point has the upper hand there. - Use initiative to prioritize targets
With good initiative and clever movement, vulnerable targets can be picked out and eliminated in one go. - Concentrate firepower, don’t scatter it
Coordinated focusing is crucial in BattleTech Alpha Strike: if you specifically take out a mech, you permanently deprive your opponent of resources.
Especially in larger battles with 8 vs. 8 mechs, the first loss is often decisive. Whoever eliminates an opponent first with a massed attack gains an advantage – especially if he doesn’t have to take much of a hit himself.
What does “skewed battle formation” mean?
The idea of an oblique order of battle (also known as an “obliquely staggered line of attack”) originates from military history. One flank is strengthened while the other is only delayed or defensive. The aim is to create local superiority, take the enemy by surprise and roll up their line before they can react.
This tactic is particularly effective in Alpha Strike because:
- units can be strengthened in a targeted manner
- Movement and initiative can be used tactically
- Mechs can be quickly eliminated by concentrated fire
Massed attack in practice – example scenario (8 vs. 8 mechs)
Game size: 8 vs. 8 mechs (two lances each)
Map: Playing field with medium cover and light forest zones on both flanks
Objective: Destruction or mission objectives (control of two strategic zones)
Attacking force:
Lance 1 (attack group on the right)
- Atlas AS7-D (Center of gravity of the attack)
- Griffin GRF-1N
- Phoenix Hawk PXH-1
- Wolverine WVR-6R
Lance 2 (deflection/edge protection left)
- Shadow Hawk SHD-2H
- Jenner JR7-D
- Rifleman RFL-3N
- Commando COM-2D
Opponent:
Lance 1 (center-heavy formation)
- Catapult CPLT-C1 (Center of gravity of the defense)
- Trebuchet TBT-5N
- Centurion CN9-A
- Enforcer ENF-4R
Lance 2 (mobile support left)
- Panther PNT-9R
- Clint CLNT-2-3T
- Hunchback HBK-4G
- Javelin JVN-10F
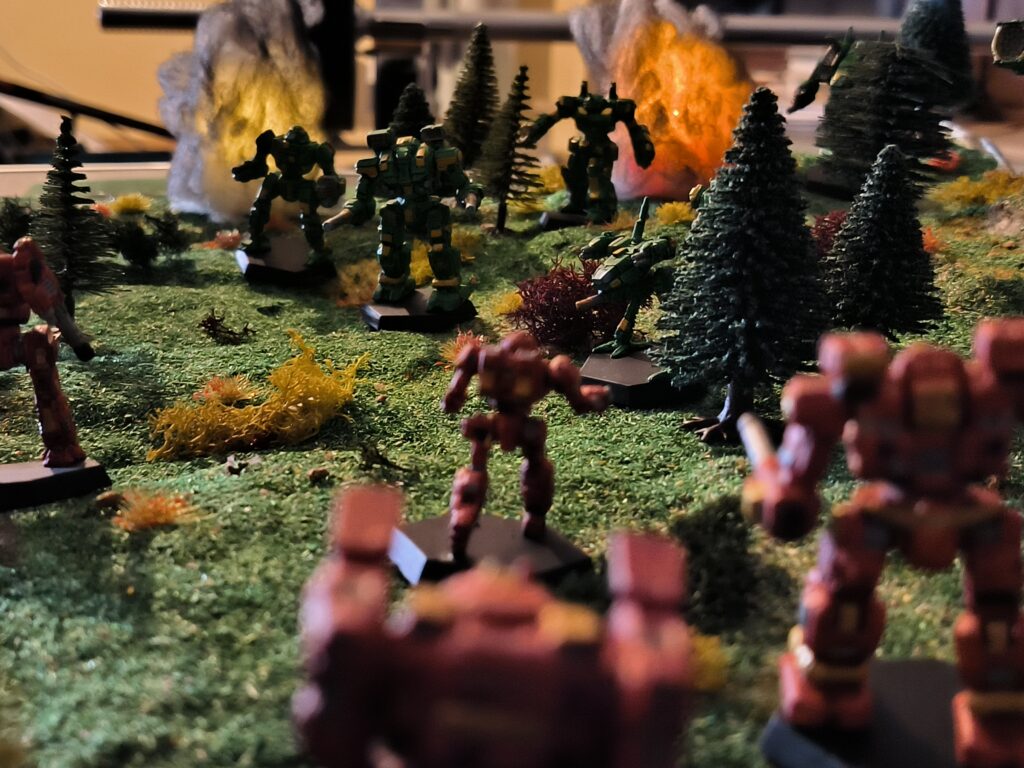
Tactics on the gaming table
1. skewed positioning
The right flank is clearly set up as a shock wedge: Atlas in front as tank breaker and leading the attack. Flanked by Griffin and Wolverine. Phoenix Hawk ready for flanking maneuvers.
On the left flank, Lance 2 acts defensively, uses forest cover and provokes the opponent with targeted movements with Shadow Hawk and Jenner.
2. concentrated advance
The four mechs on the right flank clash with the enemy Lance 1.
With coordinated fire, the Centurion falls after concentrated fire. The Catapult loses important armor and structure points.
Phoenix Hawk uses its mobility to circle around the Enforcer.
3. left flank binding
The opponent tries to press on the left flank through Hunchback and Clint – but Shadow Hawk, Jenner and Rifleman retreat in a controlled manner without taking any real damage and hold the terrain.
4th breakthrough
The Atlas brings down the Catapult. The enemy is forced to withdraw units from the left flank to stabilize its center – too late.
The Griffin flanks while the Phoenix Hawk pushes into the center. The Enforcer is destroyed, the Trebuchet retreats heavily damaged.
5. roll flanks
Now Lance 2 launches a counterattack: Shadow Hawk and Jenner attack from the left, while the right Lance dominates the center.
Panther and Javelin are suddenly caught in the crossfire and quickly go down.
6. victory through movement and firepower
With five functional mechs against only two heavily damaged opponents, the battle is decided.
Conclusion on the “massed attack” strategy and tactics
The combination of the“Massed Attack” strategy and the“Skewed Battle Order” tactic is particularly effective in larger battles with 8 or more BattleMechs per side:
- Use your strongest units in a bundle
- First bring superiority to one of the wings
- Keep the opponent busy with fast mechs on the opposite side
- Roll up the line as soon as the first breakthrough is made
Alpha Strike rewards clear focus and targeted fire discipline. Even heavy opponents quickly lose their punch if they are attacked in isolation and with focus.
Tip for your next game
- Plan your attacking flank early!
- Have a quick unit ready to break through.
- Be patient on the “weak” flank – it only serves as a distraction.
- And: Whoever scores first, scores twice. Focused fire wins games.
If you find such tactics articles exciting, check back here regularly or subscribe to the blog – there will be more on these topics soon.
Happy hunting, MechWarrior!
Sören – Battletech Alpha Strike Blog

Ich bin Sören Spieckermann, der Kopf hinter mechstrategen. Seit Jahren faszinieren mich taktische Tabletop-Schlachten und die strategische Tiefe von Mechs. Ob schnelle Gefechte in Halo: Flashpoint oder epische Schlachten bei BattleTech Alpha Strike – hier teile ich meine Erfahrungen und Taktiken mit dir. Mein Ziel? Sowohl Einsteigern den Start zu erleichtern als auch alten Hasen neue Impulse für das nächste Match zu geben.