Beyond the Company: An Introduction to Combined Arms
Hello and welcome back to mechstrategen.de! In our last article, we crossed the magic threshold and fielded a full company consisting of three lances. We learned how the strategic trio—the vanguard (Battle Lance), the flanking force (Striker Lance), and the artillery lurking in the background (Fire Support Lance)—works together like a perfectly coordinated orchestra.
Today, we’re breaking free from the traditional constraints of pure ‘Mech battles! When your tabletop skirmishes reach the magic threshold of 450 to 600 PV, you’re stepping beyond the realm of standard games. You’re now fielding a Reinforced Company! Twelve ‘Mechs are a thing of the past—today we’re expanding your force with a fourth, highly specialized element, bringing the total to 16 units.
For beginners, this step introduces one of the coolest aspects of the BattleTech universe: Combined Arms. We’re moving beyond pure ‘Mech formations and incorporating a Vehicle Lance. In Alpha Strike, vehicles are often unbeatably cost-effective in terms of points, yet they offer highly specialized firepower and mobility that perfectly complement your tactics, providing ideal support for the three ‘Mech lances you’re already familiar with.
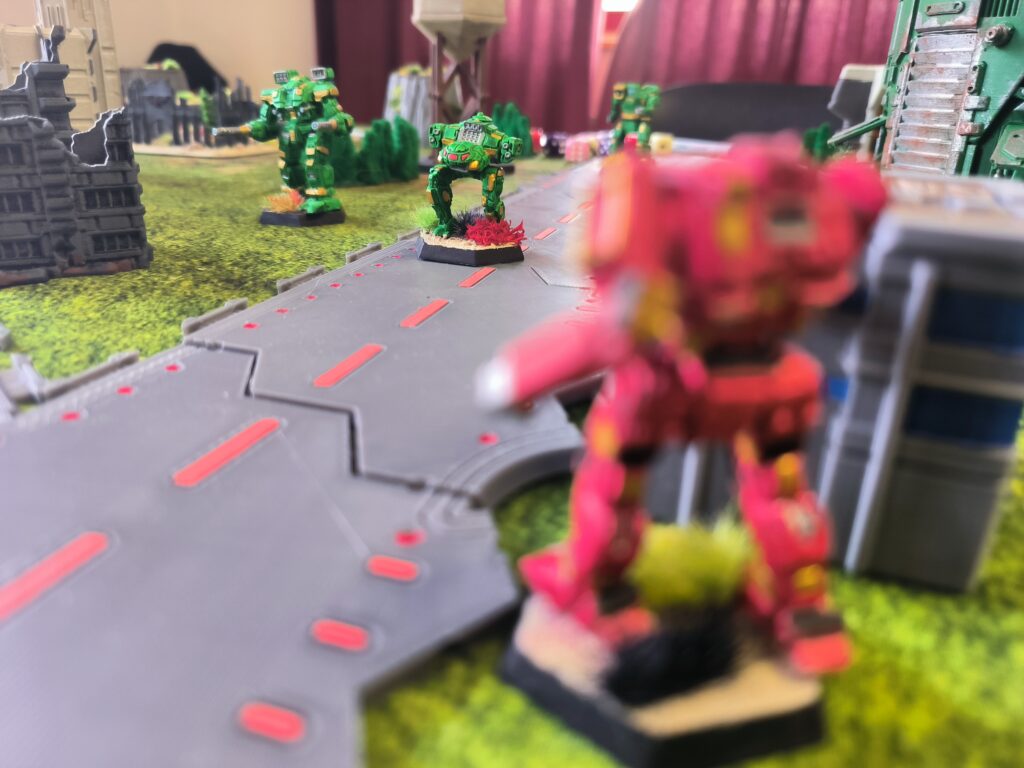
Here is the strategic roadmap for your reinforced company.
Lance 1: The Battle Lance (“The Anvil”)
- The objective: Draw attention to yourself, absorb the brunt of the damage in the center, and break through the enemy lines with sheer numbers.
- The lineup: Atlas AS7-D, Thunderbolt TDR-5S, Marauder MAD-3R, Warhammer WHM-6R.
- Why this selection? Pure reliability. They advance at a steady pace (6″ to 8″) and psychologically force the enemy to use its heaviest weapons against this “armor sponge.”
Lance 2: The Fire Support Lance (“The Wide Shield”)
- The objective: Position yourself on hills or behind safe cover within your own deployment zone and provide heavy ranged fire support for the Battle Lance’s advance.
- The lineup: Catapult CPLT-C1, Archer ARC-2R, Awesome AWS-8Q, Blackjack BJ-1.
- Why this selection? Thanks to indirect fire (
IF) from the Archer and Catapult, rockets rain down on the enemy while the shooters lie in wait behind hills, completely out of the enemy’s reach.
Lance 3: The Striker/Cavalry Lance (“The Heavy Hammer”)
- The objective: Bypass the center via the flanks and advance at lightning speed into the back of the distracted opponent.
- The lineup: Phoenix Hawk PXH-1, Griffin GRF-1N, Wolverine WVR-6R, Locust LCT-1E.
- Why this selection? Extreme mobility (10″ to 12″ MV) and high target movement modifiers (TMM of +2 or +3). They strike hard, collect the rear-attack bonus, and disappear back into cover.
Lance 4: The Recon & Medium Assault Vehicle Lance (“The Tracked Guard”)
This is where things get new and exciting for beginners. This fourth lance consists entirely of conventional tracked and wheeled vehicles. Its mission is twofold: Two extremely fast vehicles serve as scouts, while two heavier tanks act as the medium battle line. They provide support wherever it’s needed most.
The Lineup (Example – 103 PV)
| Vehicle | Role / Type | PV | MV | Damage (S/M/L) | Armor / Structure | Special Features |
| J. Edgar Light Hover Tank | Scout (Hover) | 23 | 22″h | 1 / 1 / 0 | 3/ 2 | Hover tank, extremely agile |
| Pegasus Scout Hover Tank | Scout (Hover) | 25 | 16″h | 2 / 2 / 0 | 3 / 2 | Hover tanks with more powerful armament, yet still agile |
| Manticore Heavy Tank | Medium Battle (Track) | 28 | 8″t | 3 / 3 / 2 | 6 / 3 | The All-Around Workhorse on Tracks |
| Rommel Tank | Medium Battle (Track) | 27 | 8″t | 3 / 3 / 0* | 6 / 4 | Close-Range Specialist |
Why this selection of vehicles for beginners?
Vehicles in Alpha Strike have a unique feature: They cannot perform physical attacks (such as kicks or punches) and are more vulnerable to critical hits to the tracks or engine (engine hits reduce speed). On the other hand, they are extremely low-scoring.
- The Scouts (J. Edgar & Pegasus): These hover tanks (
hfor “hover”) are lightning fast. With a movement of 22″ or 16″, they zip across the battlefield to capture mission objectives before the enemy has even moved its Mechs. They also serve as mobile spotters (reconnaissance units) for your Fire Support Lance. - Medium Battle Tanks (Manticore & Rommel): Thesetracked vehicles (
t) function like medium-weight ‘Mechs but cost fewer PV. The Manticore deals reliable damage at any range, while the Rommel, with its massive autocannon, creates an absolute no-go zone at close range.
Teamwork in the 4th Company: Tactics
With 16 units on the table, you need to look at the battlefield as a whole, just like a general. Ideally, your teamwork should run like a perfectly coordinated clockwork mechanism:
Phase 1: The Vanguard and the Base (Round 1)
Your Fire Support Lance takes up a defensive position in the rear. The two Hover Scouts (J. Edgar and Pegasus) use their immense speed to immediately rush forward and secure key strategic points on the map. Because they’re so fast, they force the enemy to adjust their movements early on.
Phase 2: The Anvil and the Escort Guard (Rounds 2–3)
Your Battle Lance is advancing through the center. But this time, it’s not marching alone: the Manticore and the Rommel tank are flanking the heavy ‘Mechs.
- The advantage: The Rommel secures the Battle Lance’s flank against fast-moving enemy attackers, while the Manticore provides additional firepower. The Battle Lance absorbs the damage, allowing the tanks to fire unimpeded. When the Scouts have targets in their line of sight, the Fire Support Lance rains down rockets from the rear using Indirect Fire.
Phase 3: The Pincer Attack (Round 3+)
While the center is ablaze and the tanks hold the line, your Striker Lance breaks out over one flank to attack the enemy from the rear. The two Hover Scouts, which had positioned themselves at the front on the first turn, now join the attack from the other flank. The enemy is caught in a classic pincer movement and collapses under the coordinated pressure of four specialized lances.
Conclusion
Getting started with Combined Arms using a reinforced company shows just how deep and strategic Alpha Strike can be without making the rules too complicated. Vehicles aren’t second-rate units—they’re the perfect, cost-effective pieces of the puzzle that cover your expensive ‘Mechs’ backs.
Remember the new golden rule: The Scouts secure the ground, Fire Support covers the skies, the Battle Lance breaks the enemy’s will, and the Strikers bring home the victory!
Transparency notice on the use of AI (in accordance with the EU AI Act):
The content of this blog is personally conceived, researched and defined by me. I use generative artificial intelligence to help me formulate and structure the texts.
Why? This enables me to prepare complex issues more precisely and to focus fully on the quality of the content and research. The final editorial control and responsibility for all published content lies solely with me.
Together for better content!
This blog is a project of the heart that can only continue to grow with your help. Every comment, every recommendation – and especially your financial support – secures the future of this platform.
Do you want this content to remain freely accessible?
This is how you can support the mission:
- NEWSLETTER REGISTRATION: Become part of the fast-growing community and never miss an update again!
- BECOME A PATREON MEMBER: Join the inner circle and get access to exclusive material and early releases.
- OTHER SUPPORT: Whether it’s a donation, sharing a post or recommending the blog to others – every form of support counts!
Let’s make this blog an even better place together!
Ich bin Sören Spieckermann, der Kopf hinter mechstrategen. Seit Jahren faszinieren mich taktische Tabletop-Schlachten und die strategische Tiefe von Mechs. Ob schnelle Gefechte in Halo: Flashpoint oder epische Schlachten bei BattleTech Alpha Strike – hier teile ich meine Erfahrungen und Taktiken mit dir. Mein Ziel? Sowohl Einsteigern den Start zu erleichtern als auch alten Hasen neue Impulse für das nächste Match zu geben.