Tactics Analysis: The Art of the Juggernaut – How to use heavy mechs effectively in Alpha Strike
Understanding the Juggernaut role: Strengths, weaknesses and purpose
In the heated arena of Alpha Strike, heavy and assault mechs are a force to be reckoned with. Their sheer presence on the battlefield can intimidate opponents and significantly influence their tactical decisions. But these titanic machines, often affectionately referred to as “Juggernauts”, are a double-edged sword. While their massive armor and devastating firepower make them true fortresses and destroyers, their Achilles heel is their often slow speed.
This presents pilots with the unique challenge of making the most of their immense advantages without becoming easy prey for faster, more agile enemies. This chapter lays the foundation for understanding the Juggernaut role. We will define what makes a mech a true Juggernaut, detail its characteristic strengths and weaknesses, and discuss the strategic niche these behemoths occupy on the battlefield.
It’s about understanding the psychological impact of their presence and how to use it to gain tactical superiority. The art of using a Juggernaut effectively begins with a deep understanding of its nature – a nature that oscillates between unstoppable destructive power and vulnerable slowness. Only by mastering this duality can you unleash the full potential of these fearsome war machines and systematically wear down your opponent until victory is inevitable.
We will analyze the fundamental trade-offs and highlight the core issue of how to maximize the advantages of these massive machines without increasing your vulnerability. A Juggernaut is more than just a pile of steel and weapons; it is a tactical statement that needs to be carefully planned and executed.
1.1: What makes a mech a Juggernaut?
A mech does not become a Juggernaut in Alpha Strike by its weight alone, but by a combination of specific characteristics that define its role on the battlefield. Typically, Juggernauts fall into the heavy (Heavy, 60-80 tons) and assault (Assault, 85-100 tons) categories, although some exceptions may exist for lighter classes if they meet certain criteria.
The key feature is above-average armor (Armor, A-value) and structure (Structure, S-value), which allows them to take enormous amounts of damage and stay in the fight. Coupled with this is significant firepower (Damage, D-value) over various ranges, often with high values in the short and medium range. This combination of robustness and destructive power is at the heart of the Juggernaut concept.
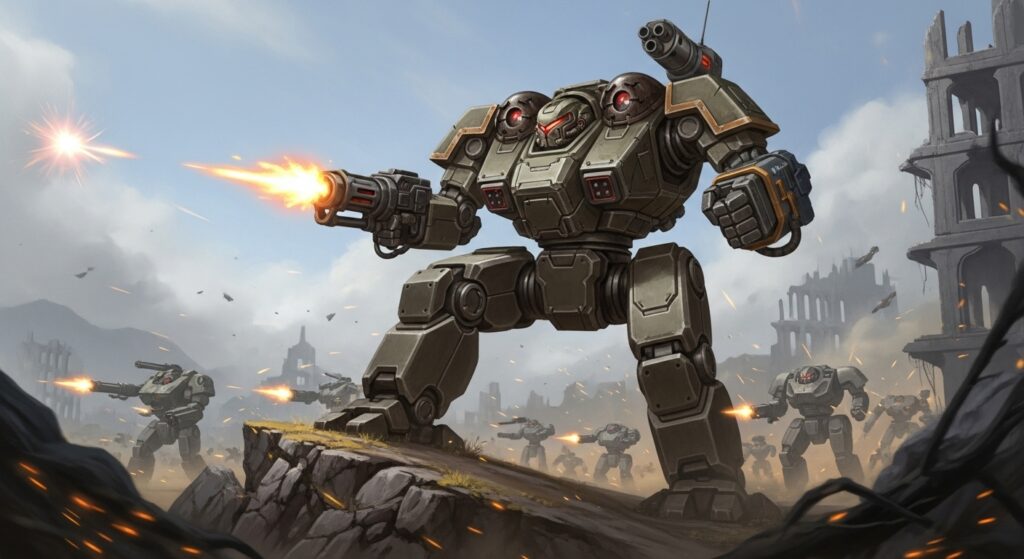
Their movement profiles are characteristically slow, often with a movement rate of 1 or 2 inches (Move, M-value), sometimes complemented by a low jumping ability (Jump, J-value). This means that they are difficult to reposition quickly, but once in position they are hard to dislodge. Important Special Abilities can reinforce this role. An Atlas (AS7-D) with its high A and S stats and impressive damage output with low mobility is a prime example. A ‘King Crab’ (KGC-0000) or a ‘Dire Wolf’ (DWF-Prime) also embody this role perfectly. These mechs are designed to hold the front line, drawing concentrated fire and dealing devastating damage in return, often as the anchor point of the entire lance.
1.2: Psychological warfare and threat perception
The mere presence of a Juggernaut mech on the Alpha Strike battlefield is a powerful tool of psychological warfare. Even before it fires the first shot, it is already influencing the enemy’s decisions. A Juggernaut projects a “threat zone” that extends far beyond its effective weapon range. The enemy knows that this mech is slow, but also that it can inflict devastating damage as soon as it is within range.
This forces the enemy to adjust their own maneuvers and targeting priorities. Lighter, faster mechs will hesitate to move into range of the Juggernaut, even if they could avoid it, for fear of a devastating counterattack. The Juggernaut becomes an “area denial” tool, securing certain corridors or strategic points simply by its potential presence. The threat it poses can tempt the enemy to concentrate valuable firepower on it to take it out – a trap that the Juggernaut can often survive due to its high armor, while other, less armored units of the Juggernaut player can operate undisturbed.
The opponent has to weigh up the options: Do I ignore the Juggernaut and risk massive losses if it gets into position? Or do I concentrate my forces on him and risk being overrun by the Juggernaut’s flanking units? This mental strain and the need to constantly react to the Juggernaut can lead to mistakes. An experienced Juggernaut pilot uses this psychological effect to dictate the pace of the game and force the opponent into a defensive posture, even if the Juggernaut itself has not yet actively engaged in combat. He is a walking dilemma for the opponent.
Chapter 2: Movement is power: Optimal positioning for slow giants
For juggernaut mechs in Alpha Strike, movement is not a question of speed, but of precise, strategic planning. While agile mechs can take the battlefield by storm, our slower giants must choose every move carefully. This chapter is dedicated to the fine art of positioning and movement, which is crucial to making the most of the advantages of armor and firepower while minimizing your own vulnerability.
It’s about not just crossing the battlefield, but dominating it. We will explore how terrain can be used as an ally to find cover, control lines of sight and channel the enemy’s advance. The ability to recognize and exploit chokepoints to concentrate firepower or take elevated positions to dominate the battlefield is vital to Juggernaut survival.
We also look at the importance of the “Zone of Control” that a Juggernaut creates by its presence and reach alone, and how to use it to direct the enemy or deny certain areas of the battlefield. A poorly positioned Juggernaut is an expensive pile of junk; a well-positioned Juggernaut is an impregnable fortress and an unstoppable threat. We will learn how to plan the advance, when to hold a position and when to tactically retreat to regroup or reach a more favorable firing position.
Avoiding evasive maneuvers and being constantly aware of your own flank safety are of the utmost importance. The true power of the Juggernaut lies not in its ability to be fast, but in its ability to be exactly where it can do the most damage and suffer the least damage.
2.1: Reading the battlefield: Terrain as ally
For Juggernaut mechs, terrain is far more than just a surface on which to move; it is a crucial tactical ally. Because they are slow, Juggernauts must take every opportunity to minimize their vulnerability and maximize their survivability. Cover and partial cover are invaluable in this regard.
A mech standing behind a forest, a building or a hill receives a cover bonus that makes it more difficult for the enemy to hit it. This is particularly important for Juggernauts, as they are often the focus of enemy fire. The ability to position yourself so that only part of the mech is exposed or the enemy’s line of sight is blocked can make the difference between victory and defeat.
Elevated positions not only provide a better view over the battlefield, but also allow the Juggernaut to shoot over obstacles that would obstruct other mechs. This can be crucial to maximizing the range of your weapons and engaging targets that appear to be safe. Chokepoints are also a powerful tool. By blocking a chokepoint, a Juggernaut can slow the enemy’s advance, forcing them to rally and concentrate the Juggernaut’s firepower on a smaller area of attack.
This turns the Juggernaut’s slowness into an advantage, as it forms a barrier that the enemy can only overcome at great cost. Consciously reading the battlefield and planning routes and final positions with foresight, taking the terrain into account, are essential for every Juggernaut pilot in order to maximize their own strengths and conceal weaknesses.
2.2: Planned advance and tactical retreat
The advance of a Juggernaut mech is a carefully choreographed operation, not a blind rush. Given their slow speed, it is crucial to plan the timing and direction of the advance with precision. A Juggernaut should advance to put pressure on the enemy, occupy critical positions or get into effective firing range. At the same time, cover must always be kept in mind so that the mech does not end up in an open flank.
Ideally, the advance should be through terrain that provides cover or creates choke points to channel enemy movement. Advancing without clear intent or into open terrain can make the Juggernaut a slow, easy target to flank. Just as important as the advance is the tactical retreat. This is not a sign of weakness, but an intelligent maneuver to leave an unfavorable position, regroup, get better lines of sight, or protect against overwhelming fire.
A juggernaut stuck in an unfavorable position quickly becomes a target. A planned retreat can mean retreating behind a ridge to break the enemy’s lines of sight, or moving into a stronger defensive position. The risk of getting “stuck” – that is, landing in a position from which you cannot move or shoot effectively without risking excessive damage – is particularly high for slow units. Therefore, maneuvering a juggernaut requires a high degree of foresight and the ability to identify potential threats several moves in advance. Every point of movement must be used to ensure the best possible combination of protection, firepower and influence on the battlefield.
2.3: Dominance through presence: controlling the space
A Juggernaut mech controls the battlefield not through quick maneuvers, but through its sheer menacing presence and the associated ‘Zone of Control’. This zone is an area of the playing field that the opponent can only enter or pass through at high risk. It is defined by the range of the Juggernaut’s weapons and its potential movement in the next turn. Even if the Juggernaut moves slowly, its maximum weapon range can cover a large area where any enemy mech that is present can expect devastating fire.
The Juggernaut does not necessarily have to shoot itself to achieve this effect; the mere threat of its firepower is often sufficient. A skillful Juggernaut pilot uses this spatial control to direct the enemy. By covering strategic corridors or key terrain features with his threat zone, he forces the enemy to take detours or move into less advantageous positions. This can tempt the opponent to change his own plans, causing him to lose valuable time and movement points. This dominance by presence is particularly effective in mission objectives that require holding positions.
A Juggernaut standing on a mission objective is extremely difficult to dislodge and can force the enemy to focus all of their firepower on that one point, which in turn relieves pressure on other parts of your command. The ability to control space and force the enemy to react to your position is a core aspect of Juggernaut tactics, turning slowness into a static but insurmountable threat.
Chapter 3: Merciless firepower: target selection and damage optimization
The impressive firepower of a Juggernaut mech is its primary weapon and the main reason why opponents fear it. But brute force alone does not guarantee victory. This chapter dives deep into the strategic use of this firepower by focusing on the crucial aspects of target selection and damage optimization. It’s not just about pulling the trigger, it’s about shooting intelligently to maximize impact and systematically wear down your opponent.
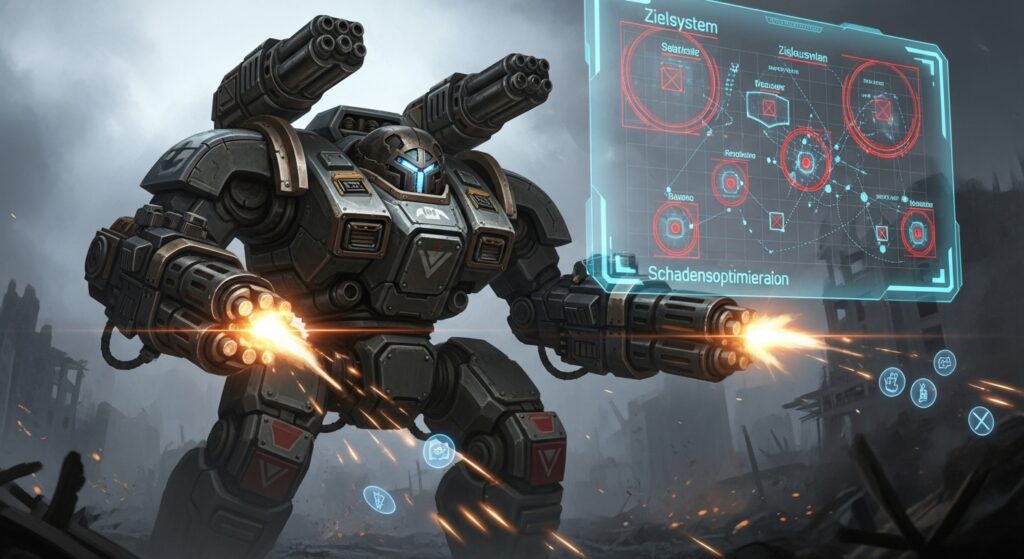
We will explore the art of target prioritization: Which units pose the greatest threat? Which targets are most susceptible to the Juggernaut’s special damage output? And how do you choose between eliminating a single, critical threat or spreading damage around to weaken multiple enemy mechs and put pressure on the entire lance? The ability to properly assess an enemy mech’s threat – whether it’s its own firepower, mobility or supporting abilities – is critical to effective target selection. We’ll also look at the mechanics of concentrated fire and when it’s most effective to focus all your firepower on a single target to take it off the field quickly. It is equally important to understand when a wider spread of damage may be more tactically advantageous to overwhelm the enemy and manage multiple threats simultaneously.
A Juggernaut that uses its firepower carelessly wastes valuable resources and gives the enemy time to recover. A Juggernaut that places its shots precisely and strategically becomes an unstoppable destroyer, dominating the battlefield and paving the way to victory. This chapter provides the tools to not only unleash the massive firepower of these mechs, but to use it with surgical precision.
3.1: Who falls first: strategic target selection
Strategic target selection is crucial for Juggernaut mechs, as every shot counts and resources are limited. The Juggernaut must use its high damage output where it will provide the greatest tactical advantage. Several factors should be considered when selecting a target: First, the threat the enemy target poses. Who can inflict the most damage on your own Juggernaut or allied mechs? This could be fast Skirmishers trying to outflank the Juggernaut, or other heavy mechs that pose a direct threat.
Secondly, the target’s damage output. If an enemy mech deals high damage itself, it should be prioritized to eliminate this threat quickly.
Third, the maneuverability of the target. Fast, maneuverable mechs are often harder to hit, but if a Juggernaut gets them in range, it can severely damage or destroy them with a single shot. Slower, heavily armored targets can also be a high priority if they hold a key position or pose another threat that only the Juggernaut can deal with effectively.
Fourthly, special abilities of the target. Mechs with ‘ECM’, ‘Stealth’ or ‘Indirect Fire’ can be extremely disruptive and should often be eliminated first to take the pressure off your own lance. A good example of a typical targeting priority would be to first eliminate fast, disruptive recon or flanking mechs that could bypass the Juggernaut, followed by enemy fire support mechs that deal damage from a distance.
Only then do you focus on other Brawlers or Juggernauts that are directly holding the front line. The ability to assess these factors in real time and direct the Juggernaut’s firepower to the most strategically important target is a sign of an experienced pilot.
3.2: Focus and finesse: Focus or distribute damage
Deciding whether to concentrate a Juggernaut’s firepower on a single target or spread it across multiple targets is one of the most important tactical considerations in Alpha Strike. Both approaches have their merits, depending on the game situation. Concentrated fire, often referred to as “focus fire”, aims to take a single enemy target off the field as quickly as possible. This is particularly effective against key targets such as enemy juggernauts, heavy gunners or mission objectives that pose a threat.
The advantage is that an eliminated target can no longer inflict damage and no longer pose a tactical threat. A Juggernaut with its high damage output is predestined to deliver focused fire and destroy even heavily armored targets in a few rounds. This can also have a psychological effect, as the rapid loss of a unit can demoralize the enemy. Damage distribution, also known as “softening up” targets, is used when you want to manage multiple threats simultaneously or overwhelm your opponent. Instead of eliminating one target, the Juggernaut deals damage to multiple enemy mechs, reducing their combat capability even if they are still on the field.
This is useful for increasing the efficiency of the entire lance, as other, lighter mechs can then take out the stricken targets more easily. It can also be tactically useful to force the enemy to spend resources on repairs or retreats. The choice depends on the number of threats, your own remaining firepower and the mission. If the opponent has only a few but very strong mechs, focus fire is often the best choice. If the opponent has many medium strength units, spreading the damage can be more effective in reducing their overall combat power. An experienced Juggernaut pilot intuitively knows when to unleash his concentrated power and when to strategically distribute his strikes.

Chapter 4: Teamwork makes the dream come true: Juggernauts in the context of the lance
A Juggernaut may be a formidable individual force, but in Alpha Strike you don’t win battles alone. This chapter is dedicated to the crucial role of teamwork and the synergy a Juggernaut can develop within a lance or commando. It’s about understanding that even the heaviest Assault mech needs support to reach its full potential, and that in return it can be an invaluable asset to its allies.
We will look at strategies for how faster and more agile units can act as “bodyguards” to protect the Juggernaut from evasive maneuvers, deflect incoming fire, or repel melee attacks. Combining with specialized support units that provide spotting for indirect fire, electronic warfare (ECM) to disrupt the enemy, or additional close combat power can exponentially increase the Juggernaut’s effectiveness.
The concept of “Combined Arms” – the intelligent combination of different unit types – is central to the successful deployment of Juggernauts. We will analyze how to combine the strengths of slow, armored mechs with the flexibility and speed of lighter units to create a balanced and deadly force. In addition, we will examine the most common counter-tactics used by the enemy against Juggernauts – from flanking maneuvers to concentrated fire and mobility kills – and how to anticipate them and plan effective countermeasures. A Juggernaut operating in isolation is an easy target; a Juggernaut seamlessly integrated into a well-coordinated team becomes the unstoppable centerpiece of a winning strategy.
This chapter provides the blueprint for using your Juggernauts as an integral and indispensable part of your battlegroup, making them true anchors of victory.
4.1: The bodyguards: protection for the giant
Even the most powerful Juggernaut is not invulnerable and needs protection. Faster and more agile mechs, often referred to as ‘bodyguards’ or ‘escorts’, play a crucial role in securing the Juggernaut and extending its life on the battlefield. Their primary task is to protect the Juggernaut from evasive maneuvers. Since Juggernauts are slow, they can easily be evaded by fast, flanking units, which can then attack their weaker armored backs. Bodyguards position themselves to cover these flanks and intercept enemy mechs before they can pose a threat to the Juggernaut.
They act as a kind of ‘shield’ and ‘spear’ at the same time. Another important function is to deflect fire. By positioning themselves aggressively and posing a threat themselves, the Bodyguards can draw some of the enemy fire that would otherwise be directed at the Juggernaut. This is particularly effective if the bodyguards themselves have enough armor to take a few hits or are agile enough to be hard to hit. They can also fend off melee attacks. If an enemy mech tries to bind the Juggernaut in close combat, the Bodyguards can intervene and intercept the attacker or attack in close combat themselves to relieve the Juggernaut.
Effective mech combinations include an ‘Atlas’ (Juggernaut) flanked by two ‘Thunderbolts’ (TDR-5S) or ‘Warhammers’ (WHM-6R), which offer both firepower and moderate speed. Or a ‘King Crab’ with ‘Griffin’ (GRF-1N) and ‘Wolverine’ (WVR-6R) as agile companions, covering the flanks and intercepting fast targets. The bodyguards allow the Juggernaut to concentrate on its core task – dealing massive damage and holding the front line – without having to constantly fear for its safety.
4.2: More than the sum of the parts: utilizing synergies
The true strength of a Juggernaut often only unfolds through the clever use of synergies with specialized support units. These combinations make it possible to compensate for the Juggernaut’s weaknesses and further expand its strengths. An excellent example is the cooperation with scouts (spotters). A light, fast mech with the ‘Indirect Fire’ (IF) ability can remain behind cover and still mark targets for the Juggernaut, which can then fire indirectly with its long-range weapons without being exposed itself.
This considerably extends the range and flexibility of the Juggernaut. Electronic warfare (ECM) is another powerful ally. Mechs with ECM can disrupt the enemy’s targeting systems, making the Juggernaut harder to hit or making enemy units with ‘Stealth’ or ‘ECM’ lose their advantages. This creates a protective zone around the Juggernaut and makes it even more resistant. Units that provide additional melee (ME) power can also be invaluable. If an opponent tries to bind the Juggernaut in close combat, these support mechs can intervene and take out the attacker before he can do any serious damage.
A ‘Cyclops’ (CP-10-Z) as a command mech with tactical capabilities can improve initiative and help the Juggernaut get into the optimal position. An ‘Archer’ (ARC-2R) can support the Juggernaut with its indirect fire by ‘softening up’ targets in advance or eliminating threats behind cover. The combination of a heavily armored Juggernaut, a fast scout and an ECM mech creates a versatile and extremely difficult to defeat battle group. These synergies transform a collection of individual mechs into a cohesive, deadly force where the individual parts reinforce each other and the overall performance far exceeds the sum of their individual abilities.
4.3: What the enemy is planning: Recognizing and countering counter-strategies
A successful Juggernaut pilot must not only know his own strengths, but also be able to anticipate and counter the opponent’s common counter-strategies. Since Juggernauts are slow and pose a high threat, opponents will do everything they can to exploit this weakness. One of the most common tactics is flanking. Fast enemy mechs will try to bypass the Juggernaut and attack its weaker armored sides or back. This can be prevented by good positioning with terrain protection and the use of bodyguard mechs.
Concentrated fire is another danger. The enemy will try to concentrate all its firepower on the Juggernaut in order to eliminate it quickly. This is where the Juggernaut’s high armor is its greatest advantage, but again it is crucial to use cover and spread the damage around as much as possible. The ability to deflect fire by making other units a threat is also important. Mobility kills are particularly treacherous.
Ignoring the Juggernaut and concentrating on the Juggernaut player’s lighter, faster units is also a legitimate tactic. In this case, the Juggernaut pilot must react quickly and either expand his threat zone or change his position in order to engage in combat and draw the opponent’s attention back to himself. Anticipating these enemy moves requires a deep understanding of Alpha Strike mechanics and enemy strategies. By anticipating the potential threats and proactively planning countermeasures – be it through deployment choices, movement of escort mechs, or prioritizing objectives – the Juggernaut can fulfill its role under pressure and lead to victory as the unwavering anchor of the Lance.